Understanding Vapor Barrier Installation
What is a Vapor Barrier?
A vapor barrier is a material used to limit the moisture migration within structures, primarily in crawl spaces and basements. Typically made of polyethylene plastic or similar materials, these barriers act as a shield against moisture coming from the ground or surrounding environment. By blocking this moisture, vapor barriers help prevent mold growth, wood rot, and overall deterioration of structural elements.
Importance of Vapor Barrier Installation
The installation of a vapor barrier is crucial for maintaining the integrity of any structure with a crawl space or basement. Without an effective barrier, moisture can lead to significant damage over time, including structural issues, increased humidity levels, and pest infestations. Additionally, vapor barriers help in enhancing energy efficiency by minimizing the load on heating and cooling systems, ultimately leading to reduced utility bills. Regular Vapor Barrier Installation ensures that homes remain dry and healthy.
Common Materials Used
Common materials for vapor barrier installation include:
- Polyethylene Film: Typically comes in thickness options ranging from 6 to 20 mils, this is the most common choice due to its effectiveness and cost-efficiency.
- Foil Tapes: Used to seal overlaps in the polyethylene to ensure a continuous barrier.
- Spray Foam: While this is more of a sealing application, it can complement vapor barriers in certain situations.
Preparing for Vapor Barrier Installation
Assessing Your Crawl Space
Before beginning the installation process, a thorough assessment of the crawl space is essential. Check for existing moisture issues, signs of mold, and evaluate the overall condition of the space. Understanding these factors will help you make necessary adjustments before proceeding with the installation, such as the need for waterproofing or repairs.
Gathering Necessary Tools and Materials
To effectively install a vapor barrier, gather the following tools and materials:
- Polyethylene sheets (the appropriate thickness for your project)
- Utility knife for cutting the sheets
- Foil tape for sealing seams
- Staple gun (optional, for securing the barrier to wooden surfaces)
- A moisture meter to monitor humidity levels
Safety Precautions to Take
Safety is paramount during vapor barrier installation. Always wear protective gloves and a mask to avoid inhaling dust or mold spores. Ensure that the crawl space is well-ventilated, and if you detect any severe mold growth or structural damage, address these issues before installing your vapor barrier.
Step-by-Step Guide to Vapor Barrier Installation
Preparing the Area
Begin by cleaning the area where the vapor barrier will be installed. Remove any debris, sharp objects, or existing old barriers. Check for holes or cracks in the crawl space that might allow moisture to breach your barrier. Repair these as needed, and if necessary, consider using a sump pump for excessive water issues.
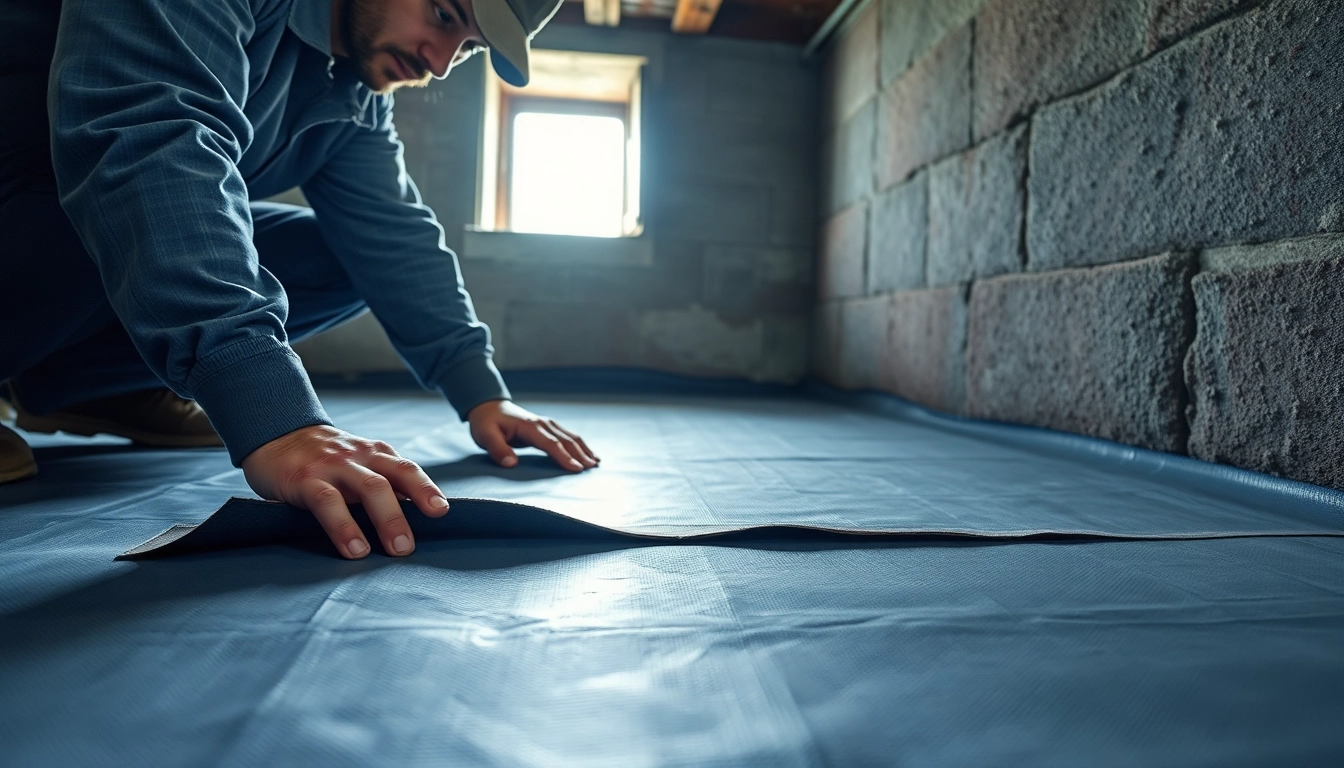
Installing the Vapor Barrier
Now that the area is prepared, unfold your polyethylene sheet and lay it flat across the ground. Ensure there are no gaps or tears in the material. Overlap the seams by at least 12 inches and secure them with foil tape. In areas where the vapor barrier meets the walls or columns, you may need to secure it with a staple gun or additional tape for a tighter seal.
Sealing and Maintaining the Barrier
After placing the vapor barrier, it’s vital to inspect and seal any remaining gaps, such as those at the corners or where the barrier meets structures. Seal these areas using additional tape or an adhesive as necessary. Maintaining an effective vapor barrier requires regular checks, as external conditions may change over time, affecting its integrity.
Common Challenges in Vapor Barrier Installation
Identifying Moisture Issues
One major challenge of vapor barrier installation is accurately identifying the source of moisture. Performing moisture testing before installation helps in addressing underlying issues. If the moisture levels in the soil around your foundation are consistently high, additional drainage solutions may need to be implemented first.
Dealing with Uneven Surfaces
Uneven surfaces can complicate the installation of a vapor barrier. It is crucial to level the ground surface as much as possible before laying down the vapor barrier. If leveling is impractical, consider using additional products like foam board insulation to provide a more stable base for the barrier.
Avoiding Contamination During Installation
Contamination during installation can occur due to dust, dirt, or existing mold. Minimizing such contamination is crucial to maintaining a clean, effective barrier. Covering surrounding areas and wearing appropriate protective gear will help limit exposure to any contaminants present in the crawl space.
Ensuring Long-term Effectiveness of Vapor Barriers
Regular Inspections and Maintenance
Regular inspection of the vapor barrier should be a part of your home maintenance schedule. At least once a year, or after heavy rainfall, check for wear, tears, or signs of moisture penetration. If any issues are identified, address them immediately to prolong the barrier’s effectiveness.
Signs of Vapor Barrier Failure
Some signs that your vapor barrier may be failing include increased humidity in your crawl space, visible mold growth, musty odors, or standing water. If you notice these signs, it’s essential to consult a professional to assess the situation and recommend the necessary corrective actions.
How to Reinstall a Vapor Barrier
If you determine that your vapor barrier needs reinstallation, first remove the old barrier and clean the area thoroughly. Follow the initial preparation steps outlined in this guide, then lay down the new vapor barrier, ensuring proper sealing and security. Professional assistance may be beneficial to ensure correct installation if you encounter major underlying issues.
Frequently Asked Questions
What is the best thickness for a vapor barrier?
The best thickness for a vapor barrier typically ranges from 6 to 20 mils, depending on the environment and specific application.
Can I install a vapor barrier myself?
Yes, DIY vapor barrier installation is possible with proper planning, materials, and safety precautions outlined in this guide.
How often should a vapor barrier be replaced?
A vapor barrier should typically be inspected annually, and replaced every 5-10 years, or sooner if signs of failure appear.
What if my crawl space has a moisture problem?
Addressing moisture issues is crucial. You may need to implement additional solutions like drainage systems and use dehumidifiers alongside a vapor barrier.
Is a vapor barrier necessary in all climates?
While vapor barriers are especially important in humid climates, they can also be beneficial in colder regions to prevent condensation issues within structures.